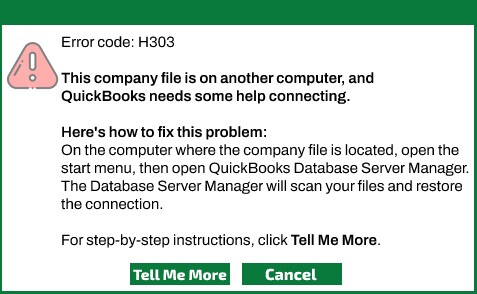
QuickBooks Error H303 is a connection error that occurs when the user tries to access a company’s file, which requires an additional configuration. This error mainly arises when the firewall has blocked the communication channel of your company’s file. Error H101, H 202, H303, and H505 are quite common and generally occur when the user tries to open a company’s file. Learn more about the QuickBooks Error H303 and the steps you can follow to resolve the error.
Why does the QuickBooks Error H303 Arises?
Its important for the user to understand the reasons behind the occurrence of the error. By knowing the reasons behind the error, you can easily prevent this error from occurring again in the future.
So, below are the possible reasons why the QuickBooks error H303 arises.
• Due to the damaged or corrupted QuickBooks network data (.ND) file.
• When the QBCF and QuickBooks database server manager is inactive.
• Using wrong hosting configuration settings.
• When the IP address is disabled to access the company’s folder.
• The third-party antivirus software is disabling QuickBooks to work efficiently.
How to Identify QuickBooks Error Code H303?
Below are the symptoms through which you can easily identify the QuickBooks error code H303.
• Not able to switch to the multi-user mode in QuickBooks.
• When the QuickBooks desktop software is not working properly.
• A pop-up window on your screen with a message displaying QuickBooks Error H303.
• Facing problems while opening the QuickBooks file.
• PC hangs frequently or does not responds to new commands.
How to Resolve QuickBooks Error Code H303?
So, once you are cleared with all the reasons and symptoms of the QuickBooks error H303, let’s look at the procedure you can follow to resolve the error.
Solution 1. Make Necessary Changes in the Firewall Settings
If the firewall settings of your PC are incorrect, then it can be the reason behind the occurrence of the error. So, to rectify the firewall settings on your PC, below are the steps you can follow.
• Firstly, go to the windows start menu by pressing the Windows button on your keyboard.
• Then, go to the windows settings.
• Moving ahead, click on the “Control Panel” option under the settings.
• Then under the control panel page, click on the “Firewall Settings” option.
• There after, click on the “Allow a Program through the Firewall” option.
• Thereon, search and click on the “Add Programs” option and further add “QuickBooks” to the exception list.
Once you are done with the above steps, restart your PC, launch the QuickBooks desktop application, and examine if this method has helped you fix the QuickBooks error H303 or is it still occurring.
Solution 2. Use The QuickBooks File Doctor Tool
The QuickBooks file doctor tool can be used to resolve any errors with the QuickBooks company file. Below are the steps you can follow to run the QuickBooks file doctor tool on your server PC to resolve the QuickBooks error H303.
• At first, exit the QuickBooks desktop application.
• Then, download the latest version of the QuickBooks Tool Hub (1.5.0.0) on your PC.
• Once the tool is installed on your PC, double-click on the downloaded file to open it. Then follow the on-screen instructions to get the tool installed on your PC.
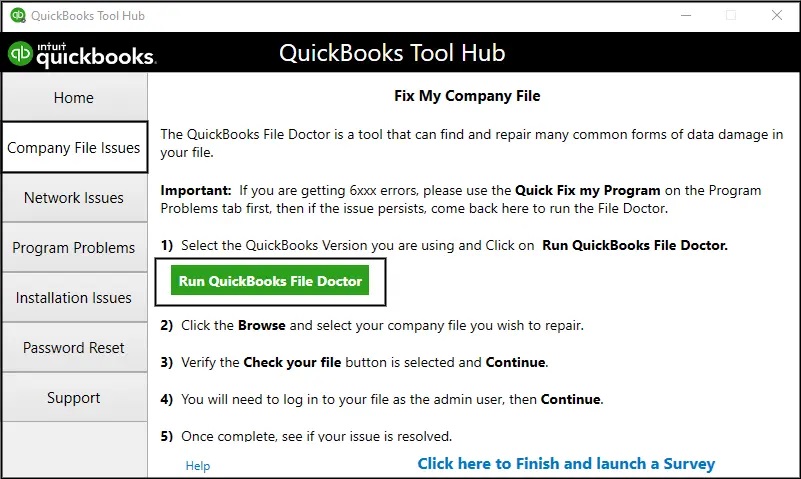
• The next step is to open the QuickBooks tool hub and then click on the “Company File Issues” option.
• After that, click on the “Run QuickBooks File Doctor” option.
• Now, select your QuickBooks company’s file through the drop-down list and then click on the “Continue” option.
• Lastly, you have to provide the login credentials of your QuickBooks account and then click on the “Next” option.
The tool will start scanning your QuickBooks desktop account for all the damaged files and components. These issues will be automatically repaired by the tool. After that, launch the QuickBooks desktop application and check if the error has been resolved or not.
Solution 3. Allow Full Permissions in the Windows Admin Group
• At first, navigate to the folder where the company’s files are saved.
• Now, right-click on the folder and then click on the properties option.
• Moving ahead, click on the “Security” option, followed by a click on the “Edit” option.
• After that, allow full permissions to the “QBDataServiceUserXX” and click on the “Allow” option.
• Then click on the “Apply”> “OK” option.
• Now, navigate to the Windows file explorer by pressing the “Windows + E” keys together.
• After that, right-click on the folder where the QuickBooks company’s file is saved.
• After that, click on the properties option, followed by clicking on the “Sharing”> “Share Add” option.
• Then, in front of the “QBDataServiceUserXX” option, set the permissions level to the max level.
• At last, end the process by clicking on the “Share” option.
Solution 4. Verify The Services of QuickBooksDBXX
Below are the steps you can follow to examine the services of the QuickBooksDBXX and QBCFMonitorService.
• Firstly, press the “Windows + R” keys to open the windows run command.
• Type “MSC” in the insert box and then hit the enter button.
• Moving ahead, search for the “QuickBooksDBXX” from the list and double-click on the file.
• After that, select the “Automatic” option under the startup type options.
• Then make sure that services must be selected as either “Running” or “Started.”
• The next step is to click on the “Recovery” tab option.
• Then under the first, second, and subsequent failures option, select the “Restart device” option.
• Lastly, end this process by clicking on the “Apply”> “OK” option.
Solution 5. Use QuickBooks Database Server Manager Tool
Below are the steps you can follow to use the QuickBooks database server manager tool on your PC to resolve the QuickBooks error H303.
• Launch the QuickBooks tool hub on your PC, which you already installed during the second solution.
• Then under the home page of the tools, click on the “Network Issues” available on the center-left side of the screen.
• After that, click on the “QuickBooks Database Server Manager” option.
• Now, click on the “Start Scan” option. After that, the scanning process will start.
• After the scanning process ends, click on the “Close” option to exit the window.
Once you have performed the steps mentioned above, then try to open the QuickBooks desktops application and check if the error has been eliminated or not.
Solution 6. Check the Hosting Settings of QuickBooks
The QuickBooks error code H303 can also arise when the hosting settings are incorrect. For configuring the hosting settings in QuickBooks, below are the steps you can follow to get it done.
• To commence this process, users must open the QuickBooks desktop application in all the workstations.
• After that, click on the “File” menu option.
• Under the drop-down list, click on the “Utilities” option.
• The next step is to click on the “Stop Hosting Multi-User Configuration” option.
• After that, again click on the “File”> “Utilities” option.
• Now, click on the “Host Multi-user configuration” option.
The End
So, that’s the end of this blog. This blog has covered all possible solutions you can follow to resolve the QuickBooks error H303. In case, while performing the steps mentioned above, you face any challenge, then you can reach to us through the chat box. You can also write to us through the mail at (rapidresolved@gmail.com). Our experienced and professional QuickBooks experts are available 24*7 at the help desk to solve your queries.