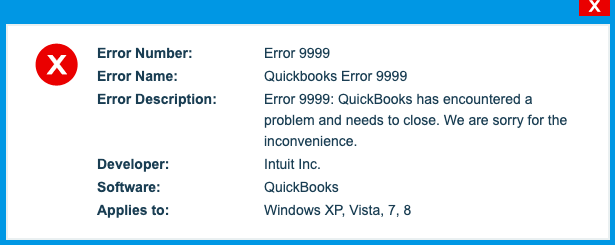
Many users of the QuickBooks online are facing the QuickBooks Error 9999. This error is a script error related to the internet connectivity and occurs when the user tries to connect with their banks. The Intuit official team has declared that the QuickBooks Error 9999 is a script error that breaks the online connection between the programs and your bank. But what are the possible reasons behind this error, and how to get it resolved?
This error occurs with a pop-up message mentioning, “Sorry, we cannot update your account. Please try updating it later (9999)”. This error is also known as QuickBooks Banking Error 9999.
Why Does QuickBooks Error 9999 Arises?
So, here is the list of the possible reasons due to why the QuickBooks Error 9999 arises.
• Working with a weak or poor internet connection fails to establish a connection between your bank and the server.
• Cache and cookies in your web browser are blocking the browser from performing the tasks.
• When the windows firewall or antivirus software is disabling the server to connect.
Read Also – QuickBooks Error 6147
How to Solve QuickBooks Error 9999?
Listing a single tried and tested solution that will work for you on the first attempt is quite hard, and there can be many reasons you are specifically facing the issue. So, below we have mentioned the simple solutions that you can easily follow step by step to fix QuickBooks error 9999.
Solution 1: Clear the Browser’s History and Cache
If you have not deleted the browser’s history and cache for a long time, then it can disable the user from connecting with the server. By clearing the history and cache, you will also improve the performance speed of the browser. As google chrome is the most used and compatible web browser, here are the steps you can follow to clear the history and cache from your Google Chrome browser.
• Firstly, launch the Google Chrome browser.
• Then press the “Ctrl + H” keys to open the history page.
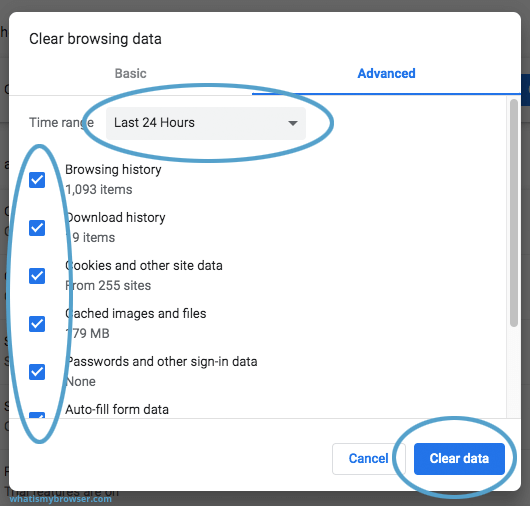
• There, from the left side of the screen, click on the “Clear Browsing Data” option.
• Then, click on the “Advanced” tab option.
• Make sure to change the time range to “All Time” and check mark all the boxes.
• At last, click on the “Clear Data” option.
Solution 2: Reconnecting your Bank Account
So, below mentioned are the steps that you can follow to establish a new connection between your bank account and server.
• Begin this process by disconnecting your current QuickBooks online account with the bank account.
• After that, click on the “Edit” option for the desired account.
• Then, click on the “Edit Account Information” option, and then click on the “Save and Close” option.
• Now, to regenerate the connection, go to the dashboard.
• After that, click on the “Add Account” option.
• Thereon, link your bank account with the QuickBooks Online account and add your “Username” and “Password.”
You have successfully reconnected your bank account with your QuickBooks Online account. After this, try to check if this solution has helped you encounter the QuickBooks Error 9999. If the error persists, jump on to the next solution.
Solution 3: Repair and restore the Windows Registry Files
If the Windows Registry files are damaged or corrupted, it can lead to an error. Repairing or fixing the windows file can help you solve the QuickBooks error 9999. So, here are the steps that you can follow to repair the Windows Registry Files on your PC.
• First, go to the Windows start menu and type “Command Prompt” in the search bar.
• After that, press and hold the “Ctrl + Shift” keys together and simultaneously press the “Enter” key.
• Then, click the “Yes” option.
• Under the “Command Prompt” window, type the “Regedit” command in the insert box and then press the enter button.
• After that, select the key related to the QuickBooks Error 9999, which you want to take backup.
• Go to the “File” menu list and click on the “Export” option.
• Afterward, select the folder or location where you want to save the backup key.
• Then under the “Export range” box and select the “Selected branch” option and then click on the “Save” option.
• At last, make sure to save the file with its extensions as “.reg.”
Solution 4: Delete Junk Files from your PC
If there are a lot of junk files on your PC, then it can be a reason for the error. So, here are the steps that you can follow to delete junk files and clean your PC’s disk.
• First, open the Windows run command by pressing the “Windows + R” keys together.
• Then, on the new pop-up window, type “Cleanmgr” in the insert box and click on the “OK” option.
• Under the disk clean-up window, select the files grabbing a huge space. You can also check to mark all of the options.
• Then click on the “OK” option.
• At last, click on the “Delete Files” option to delete the junk files permanently.
Solution 5: Restore the Previous System Changes
Incorrect settings can make many unwanted changes to your PC. If you have made any changes to your PC and are struggling with how to undo those settings, restoring the PC can help you get it done. So, here are the steps that you can follow to restore the settings.
• At first, log in to your PC in administrator mode.
• Then, go to the start menu and click on the “All Programs” option.
• After that, click on the “Accessories” option, followed by “System Tools.”
• Under the new window, select the “Restore my Computer” option.
• At last, follow the on-screen instructions and click on the “Next” option.
Solution 6: Use Windows System File Checker
With the help of the Windows system file checker, you can easily verify your system files, and in case you find an issue with any of the files, you have to solve it immediately. This process can be done with the help of the windows command prompt. So, below are the steps you can follow to get it done.
• First, go to the start menu and type “Command Prompt” in the search box.
• After that, right-click on the “Command Prompt” option and select the “Run as Administrator” option.
• After that, add the command: sfc/ scan now and hit the enter button.
It will take a few minutes to repair the QuickBooks error 9999. Once the process ends, then restart your system and check if the error has been resolved or not.
Wrap Up
Above, we have listed six solutions you can follow to fix the QuickBooks error 9999. In case, while performing any of the steps mentioned earlier, you face any challenge or if you have any query related to the topic, then feel free to reach out to our experienced and professional experts having in-depth knowledge regarding the QuickBooks topic. You can chat with us through the chat box, or you can mail us your query at (info@rapidresolved.com). Our team will be happy to assist you.
Frequently Asked Questions (FAQ)
1. How can I connect with a database in QuickBooks?
To establish a connection between a database in QuickBooks, go to the menu bar, click on the “Add a new connection” option, and then click on the Machine Data Sources tab. After that, select the QuickBooks Data DSN and click on the “OK” option. This will now connect you with the current company file opened by QuickBooks.
2. Why does QuickBooks Online not work on Google Chrome?
If you cannot log in to QuickBooks Online on Google Chrome, the issue may arise because of the browser’s history and cache, as it can slow down the performance speed of the browser. So, try clearing the browser’s history and cache to resolve the problem.
3. Can updating the PC’s windows be a solution to the problem?
Yes, by updating the PC’s windows, you can eliminate the QuickBooks error 9999. Updating the PC’s windows to the latest available version can help you to prevent many problems and errors. So, to update the windows, go to the start menu, type “Update” in the search box, and then press the enter button.